 Bird & Pigeon Pest Control
  Mice & Rat Pest Control
  Mole & Vole & Gopher Pest Control
  Fly Insect Pest Control
  Wasp & Bee Pest Control
  Moth Pest Control
  Mosquito Pest Control
  Cockroach Pest Control
  Wildlife Pest Control
  Snake Pest Control
  Bed Bug & Flea Pest Control
  Snail & Slug Pest Control
  Ant & Termites Pest Control
  Spider Pest Control
  Other Insect Pest Control
  Garden Products
  Blog
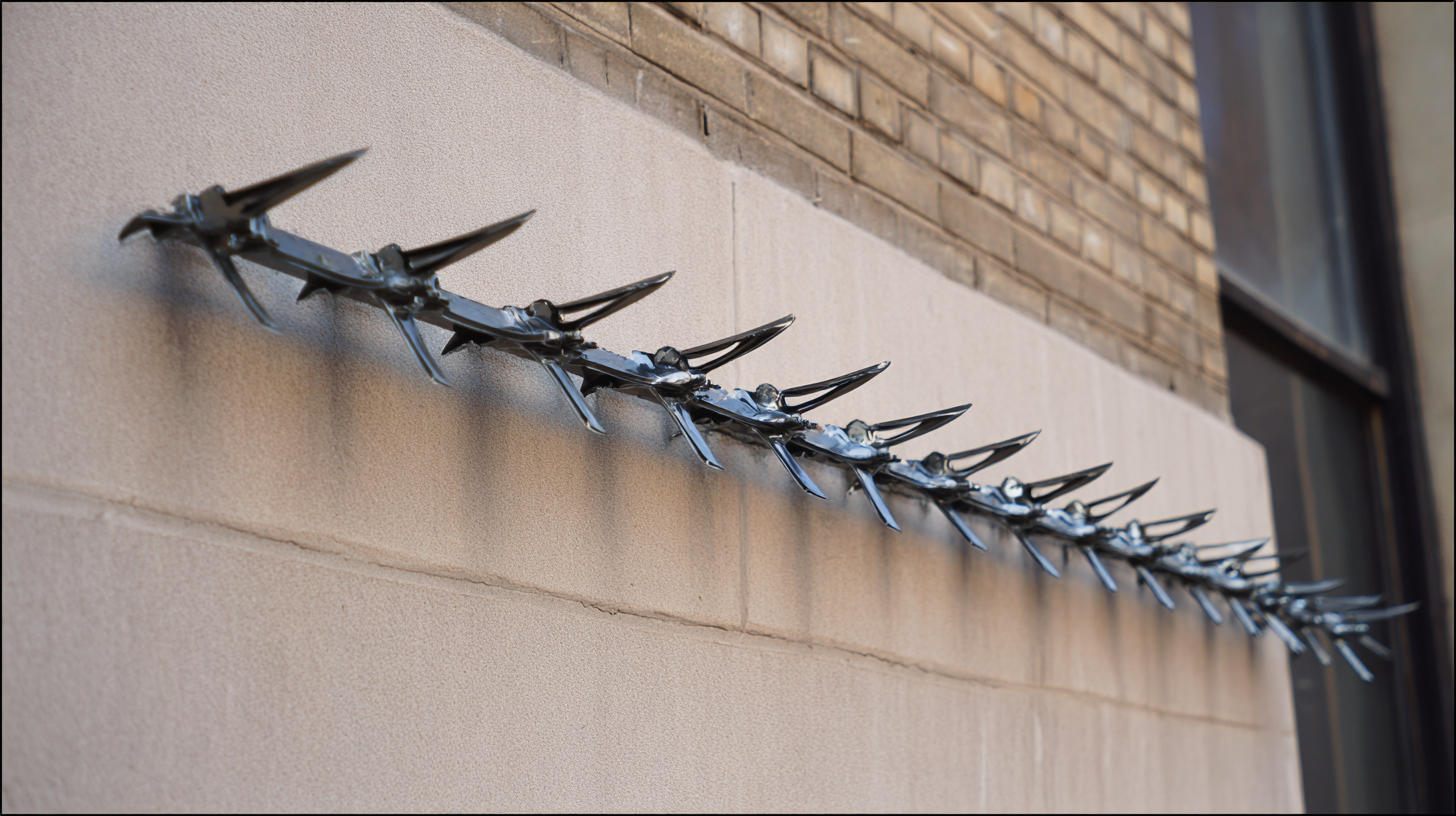
Blog In the quest for effective pest control, urban environments are increasingly turning to innovative solutions like Plastic Anti Bird Spikes, a method that has gained traction due to its effectiveness and humaneness. According to a report by the Pest Control Industry Association, bird-related damage costs businesses millions annually, making preventative measures essential. The installation of Plastic Anti Bird Spikes not only provides a physical barrier to deter birds from nesting or roosting on buildings but also contributes to maintaining a cleaner and more hygienic environment. Moreover, data indicates that cities with strategically deployed anti-bird solutions have seen a 40% reduction in bird-related complaints. Proper installation techniques and considerations are crucial to maximize the protection afforded by these spikes, ensuring both cost-efficiency and long-term results for property owners.
When choosing the right type of plastic anti-bird spikes for your needs, several factors should be considered to ensure effective deterrence. First, assess the type of birds that are causing issues in your area. Different species may respond differently to various designs and dimensions of spikes. For example, larger birds like pigeons might require a more robust and wider spike design, whereas smaller birds such as sparrows can be deterred with narrower spikes. It’s essential to select a spike that is designed explicitly for the birds prevalent in your surroundings.
Another important consideration is the installation location. Evaluate surfaces where birds frequently perch, such as rooftops, ledges, and signs. Opt for spikes specifically designed for those surfaces to maximize effectiveness. Some models are flexible and can adapt to uneven surfaces, while others are rigid and provide stronger deterrents. Additionally, consider the environmental conditions—exposed areas might benefit from UV-resistant materials to enhance durability. By selecting the right type of plastic anti-bird spikes, you can ensure maximum protection and keep your property free of unwanted avian visitors.

Preparing the installation area for plastic anti-bird spikes is crucial for ensuring optimal spike placement and maximizing effectiveness. Start by assessing the surface where the spikes will be installed—clean, flat surfaces provide the best adhesion. Remove any debris, dust, or existing bird nests; not only will this improve the bond, but it will also discourage birds from returning. According to a recent industry report, proper site preparation can increase the efficiency of pest control measures by over 30%, making it a critical step in installation.
When placing the spikes, consider the bird species prevalent in your area. Research shows that different birds have varying perching habits. For instance, studies indicate that seagulls prefer wide ledges, so ensure that spikes cover these areas sufficiently. Additionally, spikes should be spaced closely enough to prevent birds from finding gaps to land.
**Tips:** Utilize a level to mark the line where spikes will be installed, as this ensures even spacing and coverage. If applicable, consider adding a deterrent like visual or audio repellers in conjunction with the spikes for enhanced efficacy. Always follow manufacturer guidelines for installation instructions to achieve the best results.
This bar chart displays the effectiveness rating of plastic anti bird spikes installed in various locations, showcasing how well they perform in preventing bird-related issues. The rating is based on a scale from 1 to 10, with higher values indicating greater effectiveness.
Installing plastic anti-bird spikes is an effective measure to deter birds from landing on your property, reducing noise, and preventing messes. This step-by-step guide will help you secure these spikes properly for maximum protection. First, gather all necessary tools and materials, including the spikes, adhesive, and a utility knife. Choose strategic locations where birds often congregate, such as rooftops or ledges.
Before installing the spikes, ensure the surface is clean and dry to guarantee proper adhesion. Apply the adhesive to the base of the spikes and press them firmly onto the designated area. It's essential to space them appropriately to create a barrier that birds cannot bypass.
**Tips:** Consider using a combination of spikes with visual deterrents, like reflective tape, to enhance the effectiveness of your installation. Regularly inspect the spikes to ensure they remain secure and free from debris. If you notice any damage or loose spikes, replace them immediately to maintain an effective deterrent system.
| Step | Task | Materials Needed | Estimated Time |
|---|---|---|---|
| 1 | Choose the Right Location | N/A | 10 minutes |
| 2 | Gather Tools and Materials | Plastic Spikes, Adhesive, Gloves, Ladder | 15 minutes |
| 3 | Clean the Installation Surface | Cleaner solution, Cloth | 20 minutes |
| 4 | Apply Adhesive to Spikes | Adhesive | 10 minutes |
| 5 | Install the Spikes | N/A | 30 minutes |
| 6 | Allow the Adhesive to Cure | N/A | 24 hours |
| 7 | Inspect the Installation | N/A | 15 minutes |
To ensure the longevity and effectiveness of plastic anti-bird spikes, it's essential to begin with proper installation techniques. According to the National Pest Management Association, improper positioning accounts for over 30% of bird spike system failures. Ensuring spikes are installed at the correct angle and tightly secured to surfaces will prevent birds from accessing these areas. The use of high-quality adhesive or screws designed for outdoor use further enhances durability and minimizes the risk of damage from weather elements.
Regular maintenance is another key factor in extending the life of anti-bird spikes. A study conducted by the Bird Control Group revealed that systems with routine cleaning and inspection maintained a 90% effectiveness rate over three years, compared to only 60% for those neglected. Removing debris, checking for any damaged spikes, and replacing them promptly can help maintain their protective barrier. Moreover, using UV-resistant materials can significantly improve lifespan, as they resist the degradation that commonly occurs under direct sunlight. By following these tips, property owners can maximize the protection offered by their anti-bird spikes, ensuring a bird-free environment for years to come.
To ensure the long-term effectiveness of plastic anti-bird spikes, regular maintenance is crucial. Inspect the installation periodically, checking for any debris that may accumulate around the spikes. Leaves, twigs, or even feathers can create a comfortable resting place for birds, undermining the intended deterrent effect. Cleaning the spikes with a stiff brush or hose can help maintain their effectiveness, ensuring that they remain uninviting to birds.
Adjustments may also be necessary over time, particularly if you notice an increase in bird activity in the area. If certain sections of spikes appear less effective, consider repositioning them or adding more spikes in those areas. The angle and placement can be adjusted to create a more formidable barrier. Additionally, if new bird species begin to frequent your space, evaluate whether alternative deterrents, such as reflective materials or sound devices, should accompany the spikes for enhanced control. Consistent monitoring and adjustments will guarantee ongoing success in your bird control efforts, keeping your property bird-free.
